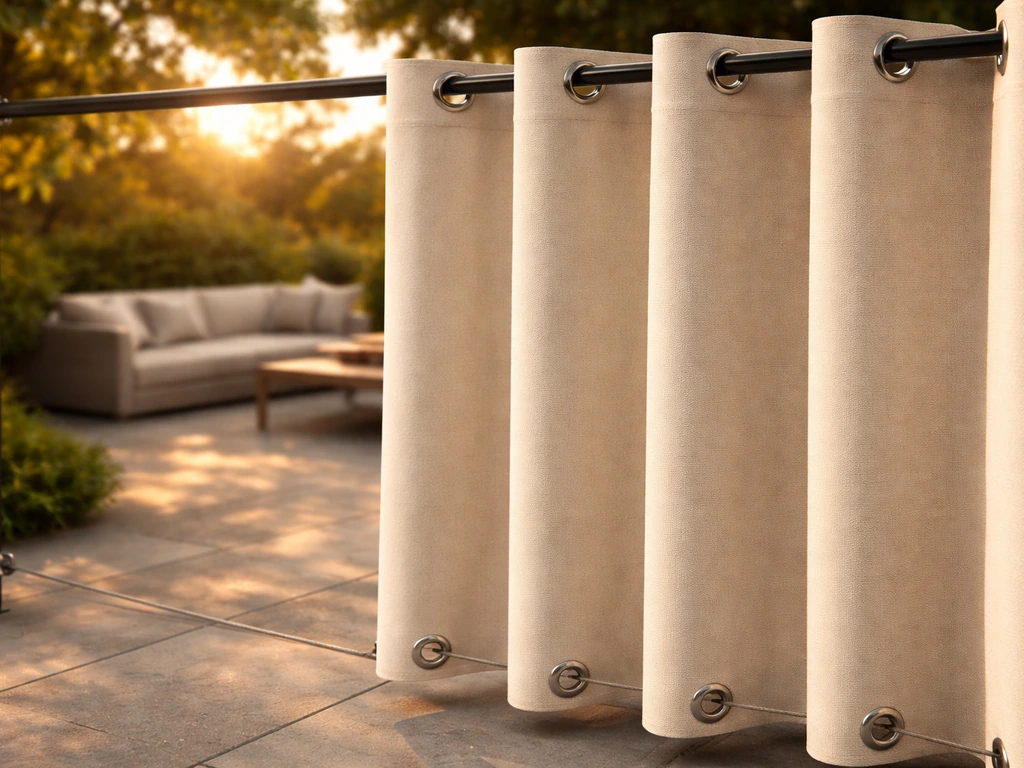
Outdoor patio curtains with grommets at both the top and bottom give you something a standard grommet-top panel never can: a curtain that actually stays put in the wind, hangs flat against your posts or frame, and blocks light and sight lines the way a real privacy screen should. If you're searching specifically for tab top outdoor patio curtains, the same top-and-bottom grommet logic applies to keeping panels secure in wind. The bottom grommets thread onto a lower rod, cable, or tension wire so the panels can't billow, flap, or wrap around themselves every time a breeze picks up. If you've tried top-only curtains outside and spent all summer chasing them back into position, this is the upgrade worth making.
Outdoor Patio Curtains with Grommets Top and Bottom: Guide

Lark Perry
1 Jul 2026
What top-and-bottom grommets actually do for you
A top grommet holds the curtain on the rod. The bottom grommet keeps it there. Without a tensioned lower anchor, an outdoor curtain is basically a sail: it catches wind, billows away from the opening, and either lets in exactly what you were trying to block or eventually tears at the stress points. If you're shopping for grommet top patio panels, make sure the panel height and rod-to-rod distance match how your hardware will tension the lower edge top-and-bottom grommets. Adding a bottom rod, cable, or bungee cord run through a matching set of lower grommets solves this by distributing the wind load across the full height of the panel instead of concentrating it at a single hang point.
For privacy, the difference is noticeable. A top-only curtain blows inward and creates gaps at the sides and bottom. A top-and-bottom panel stays planar, which means your neighbor doesn't get a view every time a gust passes through. For light control, the same principle applies: you get consistent shading instead of a panel that flaps away from the sun angle you were trying to block.
Compared to rod-pocket styles, grommet curtains slide more easily, look cleaner, and are much simpler to remove for cleaning or storm storage. Tab-top panels are casual and flexible but tend to gap between tabs and don't tension well at the bottom even if you add a lower anchor. The grommet-top-and-bottom setup is genuinely the most functional option for open, exposed patios in windy climates. If you are trying to figure out the best outdoor curtains for patio privacy in a breeze, this is the configuration to prioritize top-and-bottom grommet setup. On a screened porch where wind isn't a factor, a rod-pocket or tab-top panel is perfectly fine, and you don't necessarily need the lower anchor.
How to measure your patio opening before you buy
Get the measurements wrong here and nothing else matters. Grab a steel tape measure (cloth stretches) and measure these three things before you look at a single product listing.
- Width of the opening: Measure the full span you want to cover between posts, columns, or mounting points. For a full, gathered look, plan on panels totaling 1.5 to 2 times the opening width. For a flat, functional wind-block look (which is the point of bottom grommets), panels at 1.25 times the width work well and tension more cleanly.
- Height (rod to floor or rod to lower anchor): Measure from where the top rod will sit down to your desired hem drop. Grommet-top panels hang so the top of the fabric sits roughly 1.5 inches above the top of the grommet ring itself, and the grommet ring hangs from the rod. Factor that in or you'll get a panel that's shorter than expected.
- Lower anchor height: Decide where your bottom rod or cable will run and measure that distance from the ground. Panels meant to be taut between two anchors need to be close to the exact distance between those two points. Panels meant to just touch the ground with a light lower cable can have a little extra length built in.
Standard outdoor curtain panels come in 84-inch, 96-inch, and 108-inch lengths. Most residential patios with 8-foot ceilings or pergola beams work well with 96-inch panels, leaving a small break at the floor. If you want panels that create a taut, stretched look between a top and bottom rod, measure the exact rod-to-rod distance and order that length, or go one size up and plan to adjust the lower anchor position.
One thing most people don't account for: if you're using a lower rod rather than a cable, you need posts or brackets at both the top and bottom of the panel run, not just at the top. Map out your mounting points before you order hardware.
Materials and weather performance: what to look for and what to skip
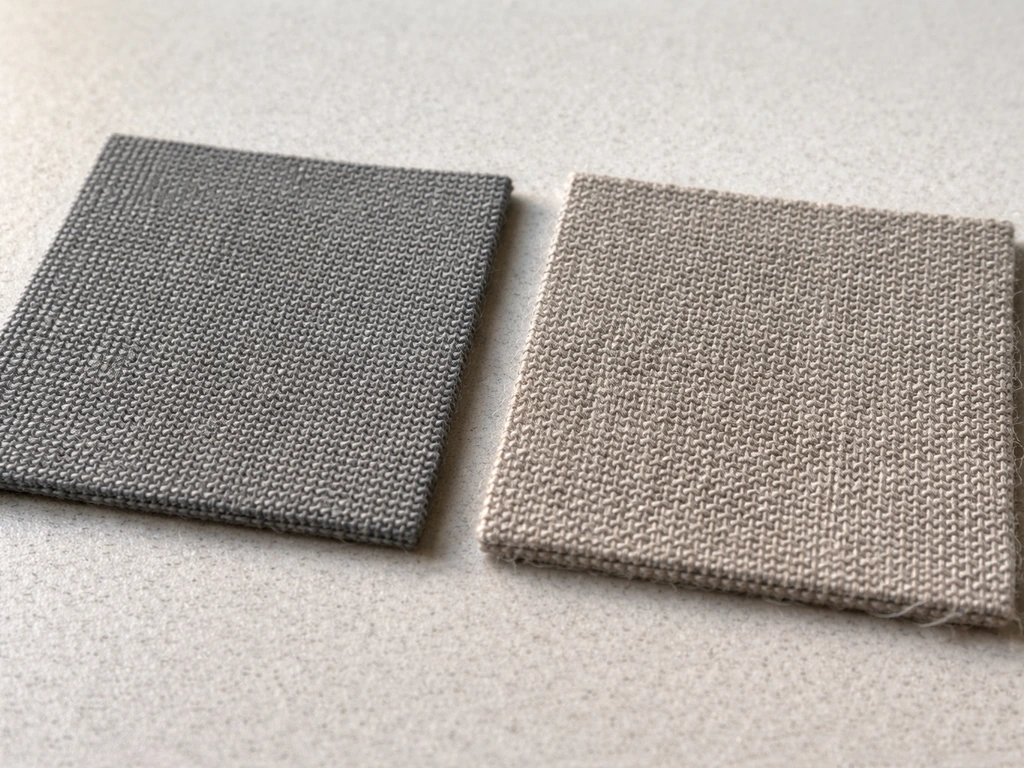
Outdoor fabric ratings can be confusing because "outdoor" on a product label doesn't guarantee UV stability, water resistance, or mildew resistance. Here's a quick breakdown of the fabrics you'll actually encounter and what they deliver.
| Fabric Type | UV Resistance | Water Resistance | Breathability | Mildew Resistance | Best For |
|---|---|---|---|---|---|
| Solution-dyed acrylic (e.g., Sunbrella) | Excellent | Good (not waterproof) | Good | Excellent | Full-sun, high-use exposed patios |
| Olefin / Polypropylene | Good | Very good | Moderate | Very good | Budget-conscious buyers, semi-exposed patios |
| Polyester (coated) | Moderate | Good when new | Low | Moderate | Covered patios, occasional use |
| Canvas / Cotton blend | Poor to moderate | Poor | Excellent | Poor | Indoor-outdoor covered use only |
Solution-dyed acrylic is the premium choice for exposed outdoor patios. The color is baked into the fiber itself during manufacturing, not printed on the surface, so it resists fading from UV exposure far better than printed polyester. Sunbrella, the most recognized brand in this category, is described as mold and mildew resistant, stain and water resistant, and built to handle sun, rain, and storms. That said, Sunbrella explicitly states their fabric is water-resistant, not waterproof, and the factory-applied water repellent does wear off over time depending on UV exposure and how often you clean it. Re-treatment with a fabric water repellent spray is part of the expected maintenance cycle.
Olefin (also sold as polypropylene) is a solid step below solution-dyed acrylic in UV performance but offers excellent color retention for its price point and resists water and mildew very well. For a covered patio or a space that gets morning shade, it's a genuinely good value. For a south-facing, all-day-sun installation, you'll likely see fading within two or three seasons.
Coated polyester is where most budget outdoor curtains live. The coating adds water resistance when the panels are new, but it degrades with UV exposure and repeated washing. The low breathability is also a real concern: moisture gets trapped against the fabric, which accelerates mildew growth on the back side. If you go polyester for cost reasons, plan on replacing them every couple of seasons.
A quick note on waterproof vs. water-resistant: true waterproofing (measured by standards like AATCC 127, a hydrostatic pressure test) means water can't penetrate under sustained pressure. Water-resistant means water beads and runs off under normal rain conditions but will eventually soak through in a sustained downpour. For most patio curtains, water-resistant is sufficient and gives you better breathability, which reduces mildew risk. Fully waterproof fabrics tend to trap moisture on the back surface where you can't see it.
Hardware and compatibility: matching grommets to rods the right way
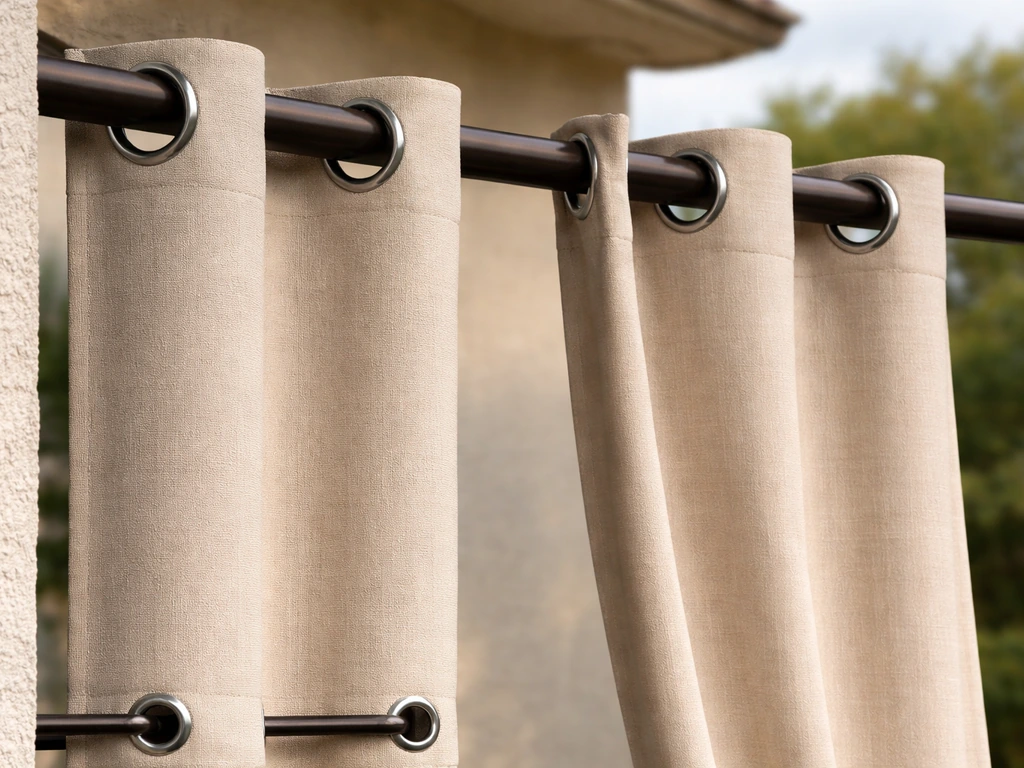
This is the part most people get wrong, and it leads to curtains that bind on the rod, slide poorly, or can't be threaded at all. The basic rule: your grommet's inner diameter needs to be at least 1/8 inch larger than the rod's outer diameter. So if you're using a 3/4-inch rod, look for grommets with at least a 7/8-inch inner diameter. If you're comparing options, a liz claiborne quinn basketweave grommet-top patio panel is a good example of matching the grommet opening to the rod size so the fabric slides correctly. The curtain should slide smoothly without forcing it.
For the lower anchor, you have three main options: a rigid rod (most stable, cleanest look, requires brackets at both ends), a stainless wire or cable with turnbuckle tensioners (flexible, can span longer distances, adjustable tension), or a bungee-style elastic cord (easiest to install, least wind resistance, good for patios where the bottom is more about keeping the hem from flapping than creating a truly taut panel). For JCPenney Home Quinn basketweave grommet top patio panels, make sure the grommet inner diameter matches your rod so the curtain can thread and slide smoothly. In exposed, windy locations, a rigid rod or tensioned stainless cable gives the best result.
For outdoor use specifically, rustproof hardware is non-negotiable. Aluminum, stainless steel, and powder-coated steel all work. Avoid anything with a plated or lacquered finish over bare steel: the coating chips and rust stains follow quickly, especially in coastal or high-humidity environments. For higher wind-load installations, heavier-gauge stainless hardware at the mounting brackets prevents the rod from flexing and the panels from pulling the top anchor loose over time.
One detail that catches people off guard: if your top rod has large decorative finials, you may not be able to thread the curtain onto the rod after installation. Finials that are bigger than the grommet's inner diameter can't pass through. Either choose a rod with removable finials, confirm the finial diameter is smaller than the grommet opening, or plan to thread the curtains before mounting the rod. Same issue applies to the bottom rod if your lower grommet spacing is tight.
Grommet material matters for longevity outdoors. Nickel-plated zinc is common and fine for covered patios. Stainless or marine-grade brass grommets are worth the premium on exposed installations where they'll see rain regularly. Plastic grommets are typically rated for lighter-weight rods (often up to about 1 1/8-inch diameter) and work fine in low-wind, covered patio setups, but they can crack over time with UV exposure and aren't ideal for the tensioned, load-bearing role a bottom grommet plays in a windy environment.
How to install them right the first time
Before you start: lay out both panels and confirm the grommets at top and bottom are aligned. Some manufacturers space the bottom grommets differently than the top, which creates a twisted panel when tensioned. Hold the panel up, run a finger through a top grommet, then the corresponding bottom grommet, and confirm they line up vertically. If they don't, contact the seller before installation.
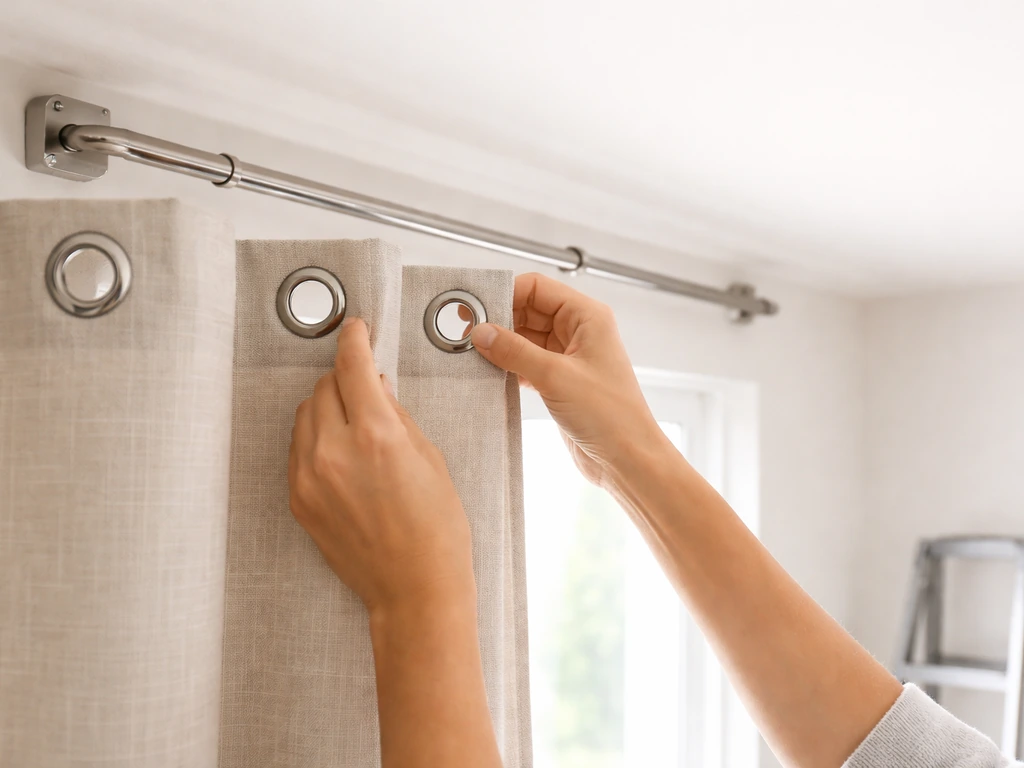
- Mount your top hardware: install brackets or ceiling mounts and set the top rod or cable in place. Don't fully tighten yet if you're using adjustable brackets.
- Thread all panels onto the top rod before mounting both ends. This is easier on the ground than overhead. If the curtain binds on the rod, a light coat of beeswax or plain paraffin rubbed along the rod helps the grommets slide smoothly without damaging anything.
- Mount the rod: secure both ends, adjust for level, and tighten all hardware.
- Install the lower hardware: mount brackets or anchor points for the bottom rod or cable. Check that the lower anchor is directly below the top rod (not shifted left or right) or your panels will hang at an angle.
- Thread the bottom rod or cable through the lower grommets. With a rigid rod, thread all panels before securing both ends, same as the top. With a cable, you can secure one end, thread panels, then secure and tension the other end.
- Adjust tension: the bottom cable or rod should be taut enough to keep the panels flat in a breeze but not so tight that it puts significant strain on the grommet eyelets. A small amount of drape is fine. Over-tensioning is the main cause of torn grommets.
- Check the panels hang plumb and the grommets aren't pulling sideways. If a panel twists, the bottom anchor point needs to shift slightly.
Common problems and quick fixes
- Curtains still billow in wind: the bottom cord or rod is too loose. Add tension to the cable with a turnbuckle, or switch to a rigid lower rod with end brackets. A bungee cord is not enough for high-wind exposure.
- Grommets tearing at top: usually caused by over-tensioning the bottom anchor, too much fabric width for the number of grommets, or grommets that are too small for the rod diameter (causing the rod to saw through the grommet). Fix: reduce bottom tension, use panels with more grommet spacing or reinforced grommet patches, and confirm grommet-to-rod sizing is correct.
- Panels hanging unevenly: the top and bottom anchor points aren't directly vertical. Use a plumb line or level app on your phone to confirm alignment before tightening hardware.
- Rod sag in the middle on wide spans: you need a center support bracket. Most residential pergola spans over 6 feet benefit from one. This is especially important on the bottom rod where wind load focuses.
- Curtains sliding to one side: grommet friction is too low (ironic but real). A small rubber bumper or S-hook with a closed ring at the outer grommet of each panel keeps them in position.
- Water pooling on top of the panel near the upper grommets: the fabric isn't pitched enough to shed water. If your top rod is perfectly horizontal, try tilting it slightly toward the house side, or confirm the fabric has enough water repellency with a re-treatment spray.
Maintenance, cleaning, and making them last
Outdoor curtains need more regular attention than indoor ones, but the routine isn't complicated. The main enemy is mildew, and it develops when fabric stays damp for extended periods. The second enemy is dirt and pollen, which hold moisture against the fabric and accelerate UV degradation.
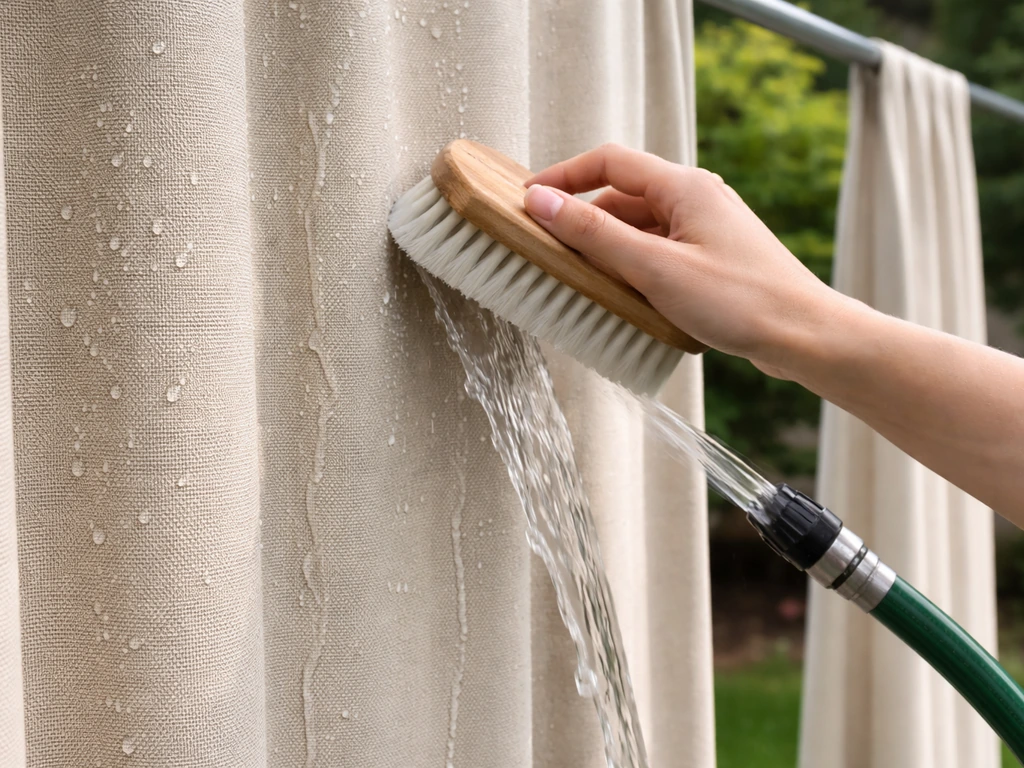
Regular cleaning
For most outdoor fabrics, brush off loose dirt first, then rinse with a garden hose. For a deeper clean on solution-dyed acrylic like Sunbrella, blank" rel="noopener noreferrer">mix a solution of 1/4 cup mild dish soap and 1/4 cup bleach per gallon of cold water, apply it to the fabric, let it soak for 15 to 20 minutes, then scrub lightly with a soft brush and rinse thoroughly. The thorough rinse matters: soap residue left in the fabric can attract dirt and degrade UV inhibitors. After rinsing, let the panels air dry completely before closing them or folding them for storage. Sunbrella recommends allowing the fabric to completely air dry after cleaning blank" rel="noopener noreferrer">let the panels air dry completely. Completely dry means completely dry, not mostly dry. Folding damp outdoor fabric is a reliable way to grow mildew in the fold lines.
If mildew has already appeared (typically as dark specks or a musty smell), the same bleach-and-soap solution works for removal on acrylic and olefin fabrics. Treat the affected area, let it dwell, scrub, rinse, and dry fully. For coated polyester, be more cautious with bleach as it can degrade the coating.
Water repellency and re-treatment
If you notice water soaking into the fabric rather than beading up, the factory water repellent has worn off. A spray-on fabric water repellent (look for products compatible with the specific fabric type) restores the DWR (durable water repellent) finish. Reapply after every major cleaning or once per season, whichever comes first.
Storm prep and seasonal storage
If a significant storm is coming, take the panels down. Even the best top-and-bottom grommet setup has limits, and a severe wind event can tear grommets, bend rods, and pull brackets out of wood or masonry. It takes about ten minutes to unthread panels and fold them inside. That's worth doing every time a real storm is in the forecast.
For winter storage in cold climates, clean and fully dry the panels before folding. Store them loosely rolled or flat in a breathable storage bag or pillowcase (not a sealed plastic bin, which traps humidity). Keep them somewhere dry and above freezing. Inspect the grommets and hems before reinstalling in spring and replace any panels with cracked grommet eyelets or fraying hem edges before the season starts.
Realistic lifespan expectations: quality solution-dyed acrylic panels with metal grommets in a maintained setup should last 5 to 8 years. Olefin panels in a semi-exposed location, 3 to 5 years. Coated polyester budget panels in full sun, 1 to 3 years. These numbers assume regular cleaning and proper storage. Leaving curtains up through a harsh winter or multiple storm seasons without removal shortens all of these timelines significantly.
Your shopping checklist and what to look for in real reviews
Before you buy, run through this checklist against any product listing you're seriously considering. It filters out most of the listings that look fine in product photos but disappoint in real outdoor conditions.
- Fabric type clearly stated: look for solution-dyed acrylic or olefin/polypropylene for exposed locations. If it just says 'polyester' with no further spec, it's likely a budget-tier panel.
- Grommet material specified: stainless or nickel-plated for covered use, stainless or brass for exposed outdoor use. Plastic grommets on a tensioned bottom anchor are a risk point.
- Grommet inner diameter listed: confirm it's compatible with your rod size (at least 1/8 inch larger than rod diameter).
- Bottom grommets spacing matches top: the listing should show or state that top and bottom grommets are vertically aligned for a flat hang.
- UV resistance rating or description: vague claims like 'fade resistant' are not enough. Look for solution-dye construction or a cited UV test rating.
- Water resistance vs. waterproof distinction: an honest listing tells you which one it is. If it says 'waterproof' for a breathable outdoor fabric, be skeptical.
- Panel width and length clearly stated (not 'pair' width): confirm you know whether a listed width is per panel or per pair.
- Hem weight or hem construction described: a weighted bottom hem helps the bottom grommets do their job and keeps the panel flat between tension points.
- Available in your specific length: check 84, 96, and 108 inch options against your measurement before settling on a product.
What to look for in real customer reviews
Filter reviews by most recent first and look specifically for reviews that mention outdoor use (not people using these on interior sliding doors). The most useful signals in reviews for this product type are comments about fading after one or two seasons, grommets cracking or pulling out of the fabric, how the panels actually performed in wind, and whether the fabric stayed clean-looking or attracted mildew. Ignore five-star reviews that only comment on color or how nice the panels look on delivery. The honest feedback shows up in three-star reviews where someone liked the product but ran into a specific real-world limitation. Reviews that mention using the product in a specific climate or wind condition are the most relevant for your decision.
If you're comparing this style to standard grommet-top-only panels or tab-top outdoor curtains, the top-and-bottom grommet design is meaningfully more functional for open, exposed patios but requires more planning around hardware and installation. If you're aiming for the best outdoor patio drapes, prioritize panels that use this full-height grommet setup to stay flat and private in breezy conditions top-and-bottom grommet design. For a covered porch with minimal wind, a simpler grommet-top panel in a quality fabric will serve you just as well with less hardware complexity. The bottom anchor earns its keep in direct proportion to how much wind your patio actually sees.
FAQ
Do I need a rod on the bottom, or will a bungee cord or cable work just as well?
It depends on your goal. If you want the curtain to stay taut and planar in wind, use a rigid bottom rod or a tensioned stainless cable with turnbuckles. If your main issue is the hem flapping or lifting, a bungee-style elastic cord can be enough because it mainly dampens movement. For any solution, confirm your bottom grommets can handle the load your chosen lower anchor creates (bungee stretches add less static stress, while rods and cables distribute wind load more evenly).
Can I use one curtain for a narrow opening, or do I need multiple panels side by side?
For grommet top-and-bottom panels, single-panel coverage works best when you have enough overlap or a clean, straight attachment at both ends. If you are bridging a wider run than one panel, plan for side gaps at the edges because wind can push fabric inward. A practical fix is ordering two panels and using an overlap or adding a vertical mounting strip on the sides so edges are anchored, not just the top and bottom.
How much overlap should I leave between panels if my patio opening is wider than the curtain width?
A common approach is to design for overlap at the edges so light and sight lines are blocked even when the fabric shifts. Start by measuring the opening and subtracting the intended overlap from the available width to choose panel count. If your area gets strong gusts, err toward slightly more overlap and anchor the side edges with hooks or tiebacks to reduce edge flutter.
What should I do if the grommets line up on one panel but not after threading it onto both rods?
First, re-check the vertical alignment by holding the panel up and verifying each top grommet matches its corresponding bottom grommet directly, not diagonally. If they match when inspected but twist after threading, the likely cause is rod misalignment (one rod mounted slightly higher, or brackets not level) or unequal rod spacing. Fix by leveling both mounting points, then re-thread before tightening any tensioner.
Can I install outdoor patio curtains with grommets on a track system instead of rods or cables?
Usually, no, because these curtains rely on grommets sliding over a round support. If you use a flat track, the grommets may not seat correctly and could bind. If you want track-like behavior, use a rod-compatible setup (round rod or tensioned cable) and add curtain rings only if the rings will not interfere with the grommet opening and threading.
Are grommets supposed to slide smoothly, or is some tightness normal?
Some snugness can be normal, but forcing the curtain to thread is a red flag. Your grommet inner diameter should be at least about 1/8 inch larger than the rod outer diameter, so fabric can move without rubbing hard. If you notice squeaking, binding, or a visible stretch in the eyelets, return or exchange rather than trying to “work it in,” because friction can tear fabric and loosen grommets over time.
What hardware should I use to mount the top and bottom supports outdoors, and how far apart should brackets be?
Use rustproof hardware, and for exposed areas, choose heavier-gauge stainless or powder-coated aluminum brackets to prevent flex. For bracket spacing, follow the rod manufacturer guidance if provided, because too-wide spacing can bow the rod and create binding at the grommets. If you do not have a rod spec, measure and aim for a conservative bracket spacing that keeps the rod straight under hand force, then double-check after threading.
How do I prevent the curtain from twisting around the bottom anchor?
Twisting usually comes from uneven tension, misaligned mounting points, or grommet spacing differences between top and bottom. Before installation, confirm top and bottom grommets align vertically on the same panel. After mounting, set tension gradually (especially with turnbuckle cables) and confirm the lower anchor is level and straight, then re-check that the fabric hangs without diagonal pull.
Can I leave outdoor grommet curtains up during rain or light storms?
For typical rain, yes, especially with water-resistant fabrics. For storms with sustained high wind, plan to remove panels, because even well-installed grommets and rods have limits and can be pulled out of brackets or bent. A simple decision rule is wind severity and duration, if you expect gusts that could lift the fabric beyond its normal shape, take them down.
How should I store them for winter without getting mildew?
Clean and dry completely, then store loosely (rolled or flat) in a breathable bag or pillowcase. Avoid sealed bins or plastic wrapping, trapped humidity is one of the fastest ways to generate mildew in folds. Before reinstalling in spring, inspect hems and grommets for cracking or fraying, and replace any panels where the eyelets look stretched or the hem edge has separated.
What if my curtains start letting in light at the bottom after a few weeks?
That often indicates the lower anchor is losing tension, the rods sag slightly, or the grommets have loosened. Check that brackets are tight, verify the lower anchor is level, and re-tension a cable if your system uses turnbuckles. Also confirm the curtain size matches your rod-to-rod distance, if the curtain is too short, it will never sit taut and gaps can form under breezes.
Next Articles
Best Outdoor Patio Drapes Buying Guide for Any Setup
Choose the best outdoor patio drapes with weatherproof fabrics, privacy and wind control, plus size and hanging tips.
Best Outdoor Curtains for Patio: Buyer Guide 2026
Choose the best outdoor patio curtains for sun, wind, privacy, and mildew resistance with sizing and install tips for 20
Top Rated Patio Cushions: How to Choose Fast and Right
Step-by-step guide to choose top rated patio cushions by fit, materials, weather durability, and easy cleaning for your