
The best patio sail overall for most homeowners is the Coolaroo Premium Rectangle (16.42 ft. x 9.92 ft., 340 GSM HDPE), which blocks up to 95% of UV, resists mold, and comes with a solid hardware kit for around $80–$110. If you're on a budget, the Coolaroo Ready-to-Hang 11.8 ft. x 8 ft. covers a small seating area for under $50. Renters and anyone who can't drill into walls should look at freestanding sail frame kits or removable adhesive anchor systems. This guide walks through every category, compares materials honestly, explains how to measure and install correctly, and tells you when a sail isn't the right tool for the job.
Best Patio Sails: Top Picks, Buyer's Guide & Installation Tips
Lark Perry
7 Aug 2026
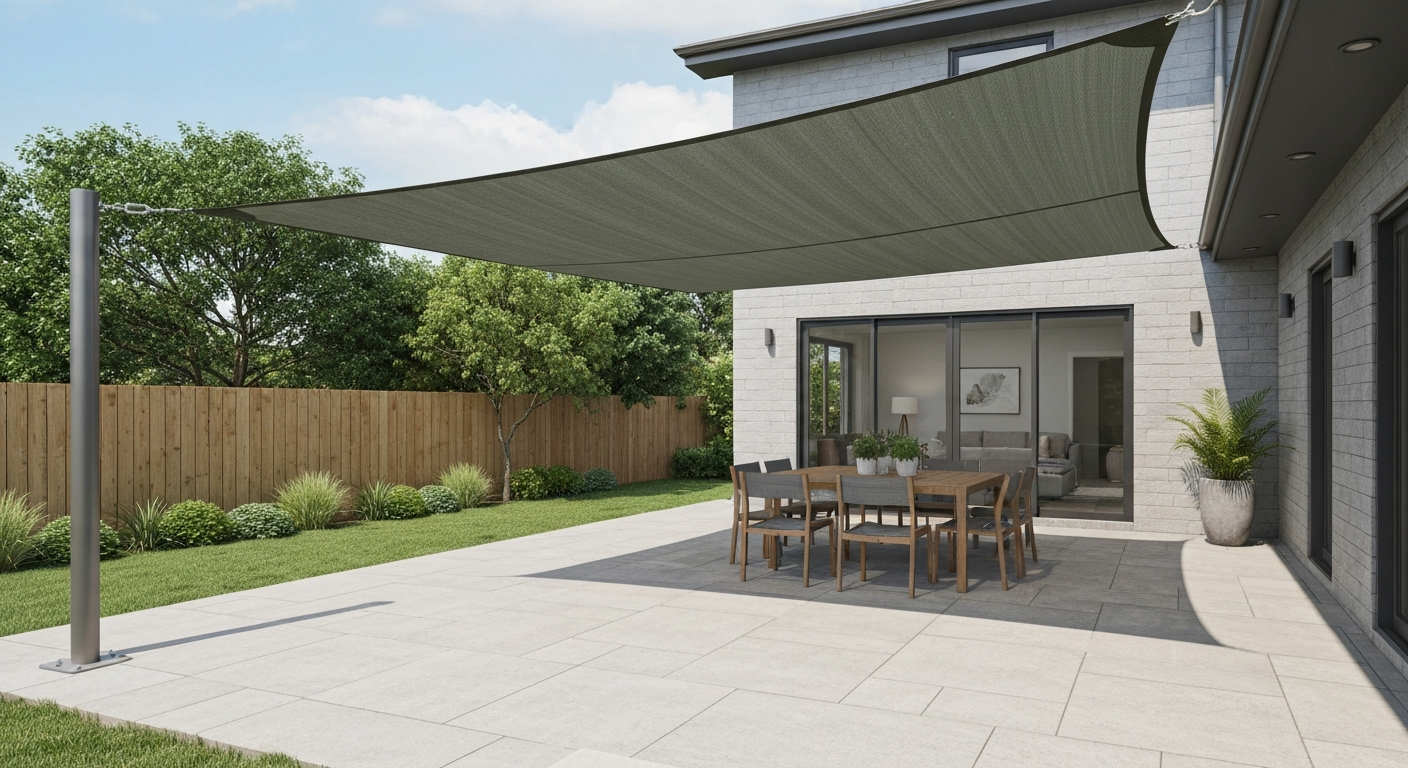
Best patio sails at a glance
Here are the top picks by category before we go deeper. Each recommendation below is backed by fabric specs, independent consumer testing from 2026, and real-world installation considerations. I've focused on models that are widely available at major U.S. retailers, have documented GSM ratings, UPF specs, and at least a basic hardware kit included.
- Best overall: Coolaroo Premium Rectangle 16.42 ft. x 9.92 ft. (340 GSM HDPE, 95% UV block, ~$80–$110)
- Best budget: Coolaroo Ready-to-Hang 11.8 ft. x 8 ft. (190 GSM HDPE, pre-attached ropes, ~$48)
- Best waterproof: Artpuch PVC-coated polyester rectangle (fully waterproof welded seams, ~$90–$140 depending on size)
- Best windproof/high-tension: Sunny Guard Heavy-Duty Triangle (reinforced edges, stainless D-rings, rated for higher wind loads, ~$60–$90)
- Best for small coverage (under 100 sq ft): Love Story 10 ft. Triangle (HDPE, 185–220 GSM, easy single-person install, ~$35–$55)
- Best for large coverage (200+ sq ft): Coolaroo Commercial Grade Rectangle (340 GSM, engineered for multi-sail overlap systems, ~$150–$250)
- Best renter-friendly: Artpuch Triangle with removable anchor kit or any sail paired with a freestanding frame (no drilling required)
Compact comparison: top picks by category
| Category | Model | Material | Size | UPF / UV Block | Waterproof? | Approx. Price | Warranty |
|---|---|---|---|---|---|---|---|
| Best Overall | Coolaroo Premium Rectangle | 340 GSM HDPE | 16.42 ft. x 9.92 ft. | UPF 50+ / 95% | No (water-resistant) | $80–$110 | 5–10 yr fabric |
| Best Budget | Coolaroo Ready-to-Hang | 190 GSM HDPE | 11.8 ft. x 8 ft. | UPF 50+ / 90%+ | No | ~$48 | 3 yr limited |
| Best Waterproof | Artpuch PVC Rectangle | PVC-coated polyester | Various (10–20 ft.) | High UV block | Yes (welded seams) | $90–$140 | 1–3 yr |
| Best Windproof | Sunny Guard Heavy-Duty Triangle | HDPE reinforced | 16.4 ft. triangle | 95% UV block | No | $60–$90 | 3–5 yr |
| Small Coverage | Love Story 10 ft. Triangle | HDPE 185–220 GSM | 10 ft. triangle | 90%+ UV block | No | $35–$55 | 1–2 yr |
| Large Coverage | Coolaroo Commercial Rectangle | 340 GSM HDPE | Up to 23 x 16 ft. | UPF 50+ / 95% | No (water-resistant) | $150–$250 | 10–15 yr |
| Renter-Friendly | Artpuch Triangle + Freestanding Frame | HDPE or polyester | 10–14 ft. | 90%+ UV block | Varies | $50–$120 total | 1–3 yr |
Short reviews of each top pick
Coolaroo Premium Rectangle (best overall)
Coolaroo is the brand that essentially invented the residential HDPE shade sail category, and the 340 GSM Premium Rectangle is their strongest consumer offering. The knitted HDPE fabric is solution-dyed so colors don't fade quickly, blocks up to 95% of UV, and the open-weave design lets air through so it doesn't trap heat underneath like solid vinyl can. It comes with stainless steel hardware and installation instructions that actually explain how to tension it correctly. The main downside is that it's water-resistant, not waterproof: in a heavy downpour, some water will pass through. You also need to hang it at a meaningful angle (Coolaroo recommends at least a 16% slope on the longest side) to keep water from pooling. For most backyards, those tradeoffs are worth it given the longevity and UV performance.
Coolaroo Ready-to-Hang (best budget)
At under $50, the Ready-to-Hang is hard to beat as an entry-level shade solution. The pre-attached ropes make it genuinely quick to set up, and at 190 GSM it's lighter than the Premium but still hits 90%+ UV block. The tradeoff is obvious: lighter fabric means it wears faster, the ropes and corner hardware are lighter-duty, and the smaller footprint (about 95 sq ft) won't shade a large dining set. I'd treat this as a seasonal, light-duty option rather than a permanent install. It works well for a small bistro corner, a kids' play area, or as a supplemental sail layered into a larger layout.
Artpuch PVC Rectangle (best waterproof)
If you need a sail that actually sheds rain rather than just slowing it down, PVC-coated polyester is the right fabric choice. The woven polyester scrim gives tensile strength while the PVC coating makes the surface fully waterproof with heat-welded seams that eliminate needle holes. Artpuch's version is solidly priced and available at common retail sizes. The downsides are real though: PVC sails are heavier (which adds load on anchors), they don't breathe, so it can feel hotter underneath compared to HDPE mesh, and they require a steeper slope angle for drainage. They also tend to have shorter warranties than premium HDPE sails from established brands.
Sunny Guard Heavy-Duty Triangle (best windproof)
The Sunny Guard stands out from budget triangles because of its edge reinforcement and heavier corner hardware. Independent 2026 consumer testing cited it as a top pick for UV blockage (around 95%) and noted its seam construction holds up better under sustained tension than lighter competitors. Reinforced edges matter because the most common shade sail failure mode is tearing at the corners or grommets from repeated wind loading. If you're in a region with regular afternoon gusts, spending an extra $20–30 over the cheapest triangle is the right call. Still not a substitute for proper tensioning and slope, but better starting hardware helps.
Love Story 10 ft. Triangle (best for small coverage)
For a compact patio, apartment balcony, or supplemental shade over a hot corner, the Love Story 10 ft. triangle checks all the practical boxes. It's light enough for one person to install alone, the 185–220 GSM HDPE blocks 90%+ of UV, and the price keeps it accessible. The limitations are what you'd expect: smaller coverage, lighter hardware, and a shorter expected lifespan than heavier commercial-grade sails. Think of it as a 2–3 season workhorse rather than a permanent fixture.
Coolaroo Commercial Rectangle (best for large coverage)
When you need to cover a large entertaining area or run multiple overlapping sails, the Coolaroo Commercial Grade is the right starting point. At 340 GSM with a 10–15 year fabric warranty, it's engineered for sustained outdoor exposure. This is the product category used in semi-permanent residential and light commercial installs. The cost is higher and the installation demands more planning (heavier anchors, properly sized posts, correct tensioning hardware), but the per-year cost of ownership over a 10-year lifespan is actually quite competitive with cheaper sails you'd replace every 2–3 years.
Artpuch Triangle with freestanding frame (best renter-friendly)
Renters can't anchor into walls or pour concrete, so the practical solution is pairing a mid-weight HDPE triangle with a weighted freestanding frame or using removable adhesive anchor plates rated for outdoor use. Artpuch's triangles attach easily to standard frame systems. The tradeoff is wind resistance: freestanding frames rely on ballast (typically 50–100 lb sandbags or water-fillable bases per leg) and can't match the tension of properly anchored sails. In high-wind areas, you should take the sail down rather than trust the frame to hold. This setup is genuinely useful for covered patios, balconies, and low-wind climates.
What I actually look at when evaluating a shade sail
Most product listings throw around "95% UV block" without context. Here's how I break down what actually matters and what the real-world tradeoffs look like.
Durability and fabric weight (GSM)
GSM (grams per square meter) is the most reliable quick measure of fabric density and durability. Residential HDPE sails typically run 190–340 GSM. A 190 GSM sail is fine for occasional seasonal use but will UV-embrittle and lose tensile strength faster than a 340 GSM sail. Budget sails often skip publishing GSM, which is itself a red flag. I won't buy a sail without confirmed GSM because that number tells me whether the manufacturer is confident in their product.
UV and UPF ratings
UPF (Ultraviolet Protection Factor) is the standard textile rating, tested under Australian/New Zealand AS/NZS 4399 and European EN 13758 standards, and independently verified by labs like Hohenstein or ARPANSA. UPF 50+ is the top rating, meaning the fabric blocks 98%+ of UV. For shade sails specifically, field trials have shown that properly installed shade cloth reduces measured solar UV under the structure by 90–94% in real outdoor conditions. The Skin Cancer Foundation's Seal of Recommendation on Sunbrella fabrics is a meaningful third-party endorsement if you're considering solution-dyed acrylic as an alternative to HDPE.
Waterproof vs. water-resistant
This is the single most misunderstood spec in the shade sail category. Most HDPE knitted sails are water-resistant, not waterproof. The open-weave structure lets fine rain through over time, and in heavy rain, water will penetrate. PVC-coated polyester sails with welded seams are genuinely waterproof, but they're heavier, less breathable, and require steeper drainage slopes. Decide which matters more to you before buying: ventilation and UV protection (HDPE) or rain coverage (PVC).
Wind rating and hardware quality
Wind load is where cheap sails most visibly fail. Grommet pull-out and corner tearing are the most reported failure modes. Better sails use reinforced webbing edges, stainless steel D-rings, and double-stitched seams. The hardware that connects the sail to anchors matters just as much: turnbuckles, shackles, and snap hooks all have published Working Load Limits (WLL). Rigging supplier data shows that even a 1/4" stainless turnbuckle carries a WLL of around 500 lb, scaling up significantly with diameter. Use stainless steel hardware throughout, and make sure WLL exceeds your calculated wind load.
Ease of installation
A sail that looks great in photos but requires a structural engineer and a concrete pour to install correctly will frustrate most homeowners. I favor products that include clear installation guides, appropriate hardware, and realistic instructions for a two-person DIY install. Coolaroo's planning guides, for example, specify post sizing tables, tilt angles, and drainage calculations. See Coolaroo blank" rel="noopener noreferrer">Shade Sail Planning Guide / Installation (Coolaroo) for post sizing tables, the requirement for at least two fixing points with turnbuckles, recommended post tilt of about 10° (1-in-10), and the minimum drainage fall of 16% of the longest side. That level of documentation signals a manufacturer that understands real installation.
Aesthetics and color options
Solution-dyed fabrics (HDPE or acrylic) hold color much better than surface-dyed options. After two or three seasons, a solution-dyed sail will still look good; a surface-dyed budget sail will fade noticeably. Triangles feel more architectural and modern; rectangles and squares cover more area per attachment point. Shade sails are genuinely one of the most visually flexible shade options available, so don't settle for a color you just tolerate.
Price and value
Residential shade sails range from under $50 to over $250 for consumer products, with park-scale engineered installations running $13,000–$22,000 per sail when you factor in engineered poles and anchors. For a typical backyard, plan on $50–$150 for the sail itself and another $50–$200 for hardware and anchoring depending on what's already in place. Cheaper upfront cost often means shorter lifespan, so calculate cost per year of use rather than sticker price.
Buyer's checklist before you order
Run through this checklist before clicking buy. It covers every spec that actually determines whether a sail performs well or sits in a garage after one season.
- Fabric type confirmed: HDPE (breathable, water-resistant) or PVC-coated polyester (waterproof, heavier)
- GSM rating published: look for 190 GSM minimum for light use, 280–340 GSM for permanent or high-exposure installs
- UPF/UV rating verified: UPF 50+ with third-party testing reference is the standard to look for
- Waterproof vs. water-resistant clearly stated by manufacturer: do not assume
- Shape and size matches your measurement (see sizing section below)
- Hardware included: check for stainless steel D-rings, snap hooks or shackles, and at least two turnbuckles per sail
- Wind rating or edge reinforcement type specified in product description
- Warranty terms stated: fabric warranty separate from hardware, duration noted
- Drainage slope achievable in your space: minimum 16% of longest side height difference recommended
- Return policy acceptable if sizing or fit doesn't work on first attempt
How to measure your patio and plan the layout
Getting the size right
Measure the area you want to shade, then add 2–3 feet on each side. Shade sails are tensioned taut, so the effective shade footprint is slightly smaller than the sail's nominal dimensions. If you're covering a 10 ft. x 12 ft. dining area, a 14 ft. x 16 ft. sail gives you reasonable coverage with room to install attachment points outside the furniture zone. For triangle sails, use the same logic: each side of the triangle should extend 2+ feet beyond what you want shaded.
Planning for the sun path
Don't just measure the space, think about where the sun is when you actually use the patio. If you primarily use the space from 2–6 PM, the sun will be in the southwest (in the northern hemisphere). Orient and position the sail so it intercepts that angle. A sail that perfectly shades at noon but leaves your space fully exposed at 4 PM isn't doing its job. Tilt the high attachment point away from the primary sun direction so the sail face angles toward the incoming sun rather than parallel to it.
Drainage slope and post height
Coolaroo's installation engineering specifies a minimum drainage slope of at least 16% of the longest sail side. In practical terms: for a 16 ft. sail, you need at least 2.56 ft. (about 2 ft. 7 in.) of height difference between the high and low attachment points. A 20 ft. sail needs at least 3.2 ft. of height difference. This isn't optional, it's the spec that prevents water from pooling in the center of the sail, which is the fastest way to blow out seams and corner hardware. Posts should tilt approximately 10 degrees (a 1-in-10 ratio) outward, away from the sail center, to accommodate the outward pull created by tensioning.
Overlap for multi-sail layouts
When covering a large area with multiple sails, plan for at least 1–2 ft. of overlap between sail edges. This closes the gap in UV exposure at sail edges and gives a cleaner visual result. Overlapping triangles in a hypar (hyperbolic paraboloid) configuration gives a modern look and helps each sail drain independently. Use a shared attachment point where sails meet rather than separate anchor points within inches of each other, which creates competing load vectors.
Shapes and sizes for common patio configurations
| Patio Type | Recommended Shape | Suggested Size | Notes |
|---|---|---|---|
| Small seating area (under 100 sq ft) | Triangle or square | 10–12 ft. sides | Single-person install, 3 attachment points for triangle |
| Narrow corridor or side yard | Rectangle | 8 ft. x 16 ft. | Long axis along the corridor, anchor at each short end |
| Standard backyard dining (100–200 sq ft) | Rectangle or large triangle | 14 x 10 ft. to 16 x 10 ft. | Add 2 ft. per side beyond furniture footprint |
| Large entertainment space (200+ sq ft) | Multiple triangles or large rectangle | Two 16 ft. triangles or 20 x 14 ft. rectangle | Plan overlaps, shared anchor points, drainage paths |
| Apartment balcony/renter | Small triangle or square | 8–10 ft. | Use freestanding frame or removable anchors |
| Pool surround | Multi-sail hypar layout | Multiple 14–16 ft. triangles | Hypar shapes aid drainage, check pool deck anchor options |
Anchoring options: permanent posts vs. temporary mounts
Permanent steel or timber posts in concrete
A properly set post anchored in concrete is the strongest and most reliable option. Steel posts (typically 3–4 in. square or round tube, galvanized or powder-coated) set in concrete footings at least 24 in. deep provide the tension resistance needed for medium to large sails. The post should tilt 10 degrees outward from the sail center to account for the inward pull of tensioning. Simpson Strong-Tie publishes detailed engineering data for their wedge anchors (Strong-Bolt 2 and Wedge-All lines): a 3/4" wedge anchor in normal-weight concrete shows nominal allowable shear of around 792 lb and tensile around 544 lb, which matters if you're attaching pad eyes to an existing concrete slab rather than pouring new footings. See the Simpson Strong‑Tie Wedge‑All Wedge Anchor product listing (Bostwick Braun) for an example 3/4" anchor listing showing nominal shear ≈792 lb and tensile ≈544 lb. Always verify embedment depth and edge distance match manufacturer tables.
Wall-mounted pad eyes and anchor plates
Existing masonry walls, brick columns, and concrete structures can serve as anchor points using through-bolted pad eyes or lag-screwed eye bolts into structural timber. Use stainless steel hardware throughout to prevent galvanic corrosion. Make sure the pad eye's WLL exceeds the expected load, and use multiple fasteners where possible to distribute force. Never rely on a single screw or nail.
Temporary mounts and freestanding frames
For renters or anyone who wants a removable setup, freestanding powder-coated steel frame kits are available in triangle and rectangle configurations for $60–$150. These use weighted bases (sand or water bags, typically 50–100 lb per leg) rather than anchored posts. They work adequately in protected spaces and low-wind climates, but should be taken down in any sustained wind over 20–25 mph. Removable concrete anchor inserts (designed for decking systems and outdoor structures) can be installed with minimal damage if you have concrete access, but confirm with your landlord first.
Fasteners, tensioning, and hardware choices
Good hardware is what keeps a shade sail from becoming a projectile in a summer storm. For each corner of the sail, you typically need: a pad eye or D-ring anchor point, a snap hook or shackle to connect to the sail's corner ring, a length of stainless cable or chain if needed to reach the anchor, and a turnbuckle to apply and adjust tension. Forged stainless shackles from reputable rigging manufacturers (Crosby and equivalents) carry a 4–6:1 design safety factor with documented WLL ratings. Match hardware size to expected load: a small triangle in a sheltered yard is very different from a large rectangle exposed to open sky. Turnbuckle WLL tables from rigging suppliers show that a 1/4" stainless eye-eye turnbuckle handles around 500 lb WLL and a 1/2" unit handles several thousand pounds, so you have appropriate options at every scale. Snap hooks are convenient but are best for light-duty or seasonal installs; screw-pin shackles are more secure for permanent installations.
Tensioning sequence matters. Attach all corners loosely first, then tighten each turnbuckle incrementally in rotation rather than fully tightening one corner at a time. This distributes tension evenly and prevents one corner from carrying disproportionate load. The sail should be drum-tight with no visible sag but not so strained that the fabric creaks or the posts visibly flex. Coolaroo's installation guide requires at least two fixing points with turnbuckles per sail, and I'd treat that as the minimum for any residential install.
Step-by-step installation guide
Before you start
- Confirm all attachment points and verify their structural adequacy (posts set in concrete, wall anchors torqued to spec, freestanding frames weighted)
- Check that height differences between attachment points achieve at least 16% drainage slope on the longest sail dimension
- Lay out all hardware and confirm you have: pad eyes, turnbuckles, shackles or snap hooks, and any extension cable needed to reach each corner
- Have a second person on hand for sails larger than 10 ft.
Installation sequence
- Install all anchor hardware (pad eyes, wall anchors) at each attachment point before touching the sail
- Attach turnbuckles to each anchor point fully open (maximum length) so you have full tensioning range available
- Attach the sail corners loosely to each turnbuckle using snap hooks or screw-pin shackles — do not tension yet
- Walk the perimeter and check that the sail is oriented correctly, the high point is on the intended drainage side, and no edges are twisted
- Tighten each turnbuckle one full rotation at a time, rotating through all corners equally until the sail is taut
- Check drainage slope by pouring a cup of water at the center: it should run to the low corner without pooling
- Inspect all shackle pins and snap hook gates are closed and locked
- Return after 48 hours and re-tension: new sails stretch slightly under initial load
Installation checklist
- All anchor points structurally verified before install
- Drainage slope meets 16% minimum of longest sail side
- Posts tilted 10 degrees outward from sail center
- All hardware is stainless steel, WLL confirmed
- Turnbuckles attached at all required corners (minimum two per sail)
- Sail corners attached with screw-pin shackles or rated snap hooks
- Even tensioning applied incrementally across all corners
- Water drainage test performed and confirmed
- All hardware gates and pins checked as closed and locked
- Re-tensioning scheduled for 48 hours after initial install
Renter-friendly and temporary solutions
Renters have real options, they just require more planning. Freestanding frame kits are the simplest: you get a powder-coated steel frame pre-configured for a triangle or rectangle sail, weight it down with sandbags or water-fillable bases, and attach your sail. No drilling, no landlord conversations. The limitation is wind resistance: these frames are not suitable for sustained winds, and you must remove or secure the sail before storms. For covered patios and balconies where there's an overhead structure, self-tapping concrete anchors or removable adhesive anchor plates rated for outdoor use (some systems specify 200+ lb pull-out strength per anchor) let you attach a pad eye without significant surface damage. Always patch and clean before moving out. Tension-pole systems (similar to spring-loaded window curtain rods but scaled up for patio posts) are an emerging category worth watching but currently limited in maximum span and load.
What it costs and what warranties actually cover
For a standard DIY residential install, budget as follows: the sail itself runs $48–$250 depending on size and grade; hardware (turnbuckles, shackles, pad eyes, cable) adds $30–$100 for a basic triangle up to $150–$200 for a large rectangle with multiple attachment points; posts and concrete footings add $100–$400 if you're setting new posts. Total installed cost for a properly anchored single-sail setup typically runs $200–$600 for a homeowner doing their own labor. Professional installation adds $300–$800 in labor for a simple residential job.
Warranty terms vary significantly and the fine print matters. Coolaroo's fabric warranties (3–15 years depending on grade) cover fabric defects and UV degradation but typically exclude damage from improper installation, storm damage, or failure to maintain correct tension. Hardware warranties are usually shorter, often 1–3 years. PVC-coated sails from smaller brands frequently carry only 1-year warranties. A 10-year Sunbrella fabric warranty is among the strongest in the category and specifically covers color retention and fabric integrity. Always register your product warranty if required and keep your purchase receipt.
Maintenance, cleaning, and storm-season care
Routine cleaning
HDPE sails can be cleaned while installed using a mild soap solution and a soft brush, then rinsed thoroughly. Most manufacturers recommend against bleach for HDPE fabric. Sunbrella and solution-dyed acrylic fabrics can handle a diluted bleach solution (1 cup bleach per gallon of water) for mold and mildew treatment, followed by thorough rinsing. PVC sails should be wiped clean with mild soap and water; avoid solvents that can degrade the PVC coating. Don't let leaves, debris, or standing water sit on any sail for extended periods.
Seasonal storage
In climates with significant winter weather, taking your sail down for storage is the right call. HDPE is mold-resistant but prolonged exposure to freeze-thaw cycles, ice loading, and winter storm winds will shorten fabric and hardware life. Before storing, clean the sail thoroughly, allow it to dry completely, then fold (don't roll tightly) and store in a breathable bag or box. Clean and lightly lubricate turnbuckle threads with a marine-grade anti-seize before storing to prevent corrosion lockup.
Storm-season care
Remove sails before any named storm, hurricane warning, or forecast sustained wind over 35–40 mph. No residential shade sail is rated for hurricane-force winds. If a storm is approaching and you can't remove the sail in time, loosen all turnbuckles to reduce sail tension and allow more movement rather than tearing at the corners. Inspect all hardware for corrosion, bent components, or stretched grommets after every significant wind event, and re-tension as needed. The most common failure modes, UV embrittlement, seam tearing, grommet pull-out, hardware corrosion, and sagging from insufficient tension, are all largely preventable with regular inspection and timely maintenance.
Maintenance checklist
- Clean sail with mild soap and soft brush at least once per season
- Inspect all hardware (turnbuckles, shackles, snap hooks) for corrosion or deformation every 3 months during use season
- Re-tension the sail after storms and at the start of each season
- Check grommet/D-ring areas for any fraying or tearing — address immediately
- Remove sail before any storm with forecast winds over 35 mph
- Fully dry sail before seasonal storage
- Lubricate turnbuckle threads with marine anti-seize before storage
- Inspect fabric surface annually for UV embrittlement (fabric becomes brittle, faded, or tears easily under light handling)
When a shade sail isn't the right answer
Shade sails are versatile but not universal. Here's an honest comparison against the main alternatives for situations where a sail may not be the best fit.
| Shade Option | Best For | Coverage | Waterproof? | Wind Resistance | Install Complexity | Typical Cost | Key Drawback |
|---|---|---|---|---|---|---|---|
| Shade sail (HDPE) | UV protection, aesthetic flexibility, large span | Medium to large | No (water-resistant) | Moderate with proper hardware | Moderate (DIY possible) | $50–$250 + hardware | Not waterproof, needs slope for drainage |
| Retractable awning | Rain coverage, motor-operated convenience | Small to medium | Yes (most) | Low (retract in wind) | High (usually professional) | $800–$3,000+ | High cost, limited to wall attachment |
| Patio umbrella | Portable, quick setup, small areas | Small | Varies | Low (must be anchored) | Very easy | $50–$500 | Limited coverage, tips in wind |
| Pergola + shade cloth | Permanent structure, large coverage | Large | No (unless topped) | High (fixed structure) | High (construction required) | $2,000–$10,000+ | Requires permits, major construction |
| Freestanding canopy | Temporary full coverage, events | Medium | Yes (most) | Low | Easy | $100–$400 | Temporary only, not attractive long-term |
If full waterproofing and year-round protection are your priority, a retractable awning or solid roof pergola is a better fit than any shade sail. If you primarily need UV protection for a large area, want an architectural look, and can engineer proper anchor points, a shade sail is genuinely hard to beat on cost and flexibility. For patio-specific shade comparisons, our guides on patio sun shade reviews and patio shade sail reviews explore specific fabric and construction options in more depth.
Pros and cons summary and how to pick the right sail
Shade sails: pros
- Excellent UV/UPF performance (UPF 50+, 90–95% UV block in field conditions)
- Large coverage area at low per-square-foot cost compared to hard structures
- Wide shape and color options for visual flexibility
- DIY-installable for most homeowners with basic tools
- Removable for seasonal storage, extending product lifespan
- Solution-dyed HDPE is mold-resistant and low-maintenance
Shade sails: cons
- Not waterproof (HDPE variants, which are most common)
- Require proper slope for drainage or water pools and damages the sail
- Wind loading requires engineered anchor points, not just deck screws
- Poor-quality hardware is the most common failure point
- Must be removed before major storms
- Budget sails (under $60) have short lifespans and light hardware
Decision flow: which sail for you
- Need full rain coverage: choose PVC-coated polyester sail or switch to an awning
- Need UV protection with good airflow and large coverage: choose 280–340 GSM HDPE rectangle (Coolaroo Premium or Commercial)
- Budget under $60 for a small area: Coolaroo Ready-to-Hang or Love Story 10 ft. triangle
- Renting or can't drill: freestanding frame + mid-weight triangle, remove before storms
- High-wind area: prioritize reinforced-edge models (Sunny Guard), proper hardware, and plan to take the sail down in storms
- Largest possible coverage with longest lifespan: Coolaroo Commercial Grade with professional installation and engineered posts
Quick action checklists
Buyer's checklist
- Measure patio and add 2–3 ft. per side to find minimum sail size
- Confirm fabric type (HDPE vs. PVC) matches your waterproof/breathability priority
- Check GSM (190 GSM minimum, 340 GSM for long-term installs)
- Verify UPF 50+ rating from a third-party test reference
- Confirm stainless hardware is included or budgeted separately
- Read warranty terms before purchase: fabric vs. hardware, what voids it
- Check return policy in case sizing doesn't work
Installation checklist
- All anchor points structurally verified (posts in concrete, wall anchors to spec)
- Drainage slope at least 16% of longest sail side confirmed
- Posts tilted 10 degrees outward from sail center
- All hardware stainless steel with WLL confirmed
- Minimum two turnbuckles per sail
- Even incremental tensioning applied across all corners
- Water drainage test completed and passed
- All shackle pins and snap hook gates locked
- Re-tensioning scheduled for 48 hours post-install
Maintenance checklist
- Clean sail with mild soap solution once per season minimum
- Inspect all hardware every 3 months during use season
- Re-tension after storms and at season start
- Inspect grommets and seams for wear or tearing each season
- Remove before any forecast winds over 35 mph
- Dry completely before seasonal storage
- Lubricate turnbuckle threads with marine anti-seize before storage
- Check fabric annually for UV embrittlement
Related guides worth reading
If you're still comparing shade solutions more broadly, our patio shade sail reviews guide goes deeper on specific fabric performance testing, while patio sun shade reviews covers a wider range of shade product categories including screen panels and pergola covers. See our patio sun shade reviews for broader comparisons across screen panels, pergola covers, and other sun-protection options. If budget is the deciding factor, affordable shade patio covers reviews compares shade sails, canopies, and pergola kits across price tiers. And if you're still deciding between shade types altogether, what is the best outdoor patio shade walks through the decision framework from scratch based on your patio's specific geometry and climate. For a step-by-step decision framework based on your patio’s geometry and climate, see what is the best outdoor patio shade.
FAQ
Which patio sails are the best by category (best overall, budget, waterproof, windproof, small coverage, large coverage, renter‑friendly)?
Best overall: a high‑GSM HDPE sail (≈300–340 GSM) from a reputable brand (e.g., Coolaroo/Gale Pacific style premium lines) — balances UV protection, breathability, durability, and install kits. Budget: ready‑to‑hang HDPE sails (small sizes, pre‑attached ropes/hardware) — low cost but intended for temporary/light use. Waterproof: welded PVC‑coated polyester or heavy coated vinyl tensile fabric (commercial‑grade) — fully waterproof and durable but heavier and needs stronger anchors. Windproof: purpose‑rated tensioned sails with reinforced corners, high‑grade rigging (stainless shackles/turnbuckles) and engineered posts; look for manufacturer wind ratings or commercial tensile specifications. Small coverage: small rectangle/triangle HDPE kits (e.g., 8–12 ft sides) — easy to tension and renter‑friendly. Large coverage: large rectangles or multiple overlapping HDPE sails (16+ ft spans) or engineered PVC tensile membranes with professional installation for long spans. Renter‑friendly: temporary mounts (wall/rafter anchors, removable posts, brick clamp anchors) combined with small/medium ready kits (HDPE), avoiding drilled permanent anchors where possible.
How do fabric types compare (HDPE knitted, solution‑dyed acrylic, PVC‑coated polyester)?
HDPE (knitted): breathable, blocks ~90–95% UV, lightweight, mold‑resistant, low cost, sold in GSM (190–340 GSM). Good for heat reduction but water‑permeable (drains, no pooling). Solution‑dyed acrylic (Sunbrella style): excellent colorfastness, good water repellency but not always fully waterproof unless coated, high UV resistance and fade resistance, often with long warranties — good for premium awning‑like sails. PVC‑coated polyester: fully waterproof, weldable seams, high tensile strength for engineered/waterproof installations; heavier and needs stronger anchors and professional detailing.
What buyer specifications and checklist should I use before choosing a sail?
Buyer checklist: desired coverage area and shape; fabric type and GSM/UPF or manufacturer UPF lab data; waterproof vs water‑resistant need; wind rating or manufacturer guidance; corner reinforcement (webbing, stitched seams, double hems); hardware included (type of shackles, turnbuckles, D‑rings) and material (stainless recommended); tensioning method (turnbuckles/ratchets); anchor/fastener requirements and WLL specs; warranty length and exclusions; return policy and replacement parts availability; color and UV/fade warranty; installer competence for large spans or waterproof membranes.
How do I measure and plan layout for effective sun blocking and drainage?
Measure: map the patio footprint and record the sun path (morning/evening sun angles) and critical times you want shade. Size: allow overlap or multiple sails for even coverage; for one sail, longest diagonal should exceed the area you want shaded. Drainage/tilt: always slope a sail — recommended minimum fall is about 1 in 6 (≈16%) of the longest side (Coolaroo guidance) to avoid water pooling; a 5–10° tilt is common for HDPE (enough to shed water). Attachment points: pick at least three non‑colinear anchor points for triangular sails; four for rectangles (can be tensioned into a hypar shape to shed water). Clearance: keep sufficient headroom and consider seasonal sun changes.
What are safe and practical anchoring/installation options for homeowners and renters?
Permanent posts: poured concrete footings sized to post and sail loads; use structural post sizes per planning guide and through‑bolted base plates. Temporary/less‑permanent: removable base mounts bolted to existing concrete pads, screw‑in anchors for soft ground with rated load, or clamp/masonry sleeve anchors for brick/rafter anchors (for renters, use non‑penetrating weighted bases or clamps where allowed).Wall/rafter mounts: use structural members only; attach to studs/roof beams with bolted pad eyes or engineered through‑bolts. Hardware: use stainless steel or galvanized rigging, rated shackles and turnbuckles sized so WLL > expected tension. Tensioning: always use a turnbuckle or ratchet for adequate tensioning and to reduce flutter and sagging.
How do I estimate loads and choose fasteners/hardware safely?
Estimate loads: wind loads are dominant; for residential sails assume significant dynamic tension — when in doubt use conservative sizing or consult an engineer for large sails. Hardware selection: choose shackles/turnbuckles/eye bolts with marked Working Load Limits (WLL) and use grade/size appropriate to loads; select anchors (concrete wedge, through‑bolts, or embedded footing) and verify manufacturer allowable loads for the specific embedment/edge conditions (Simpson Strong‑Tie tables). Use safety factors: rigging catalogs use design factors (often 4:1–6:1) — ensure installed WLL comfortably exceeds expected peak tension. Corrosion: select 316 stainless for coastal areas.
Next Articles
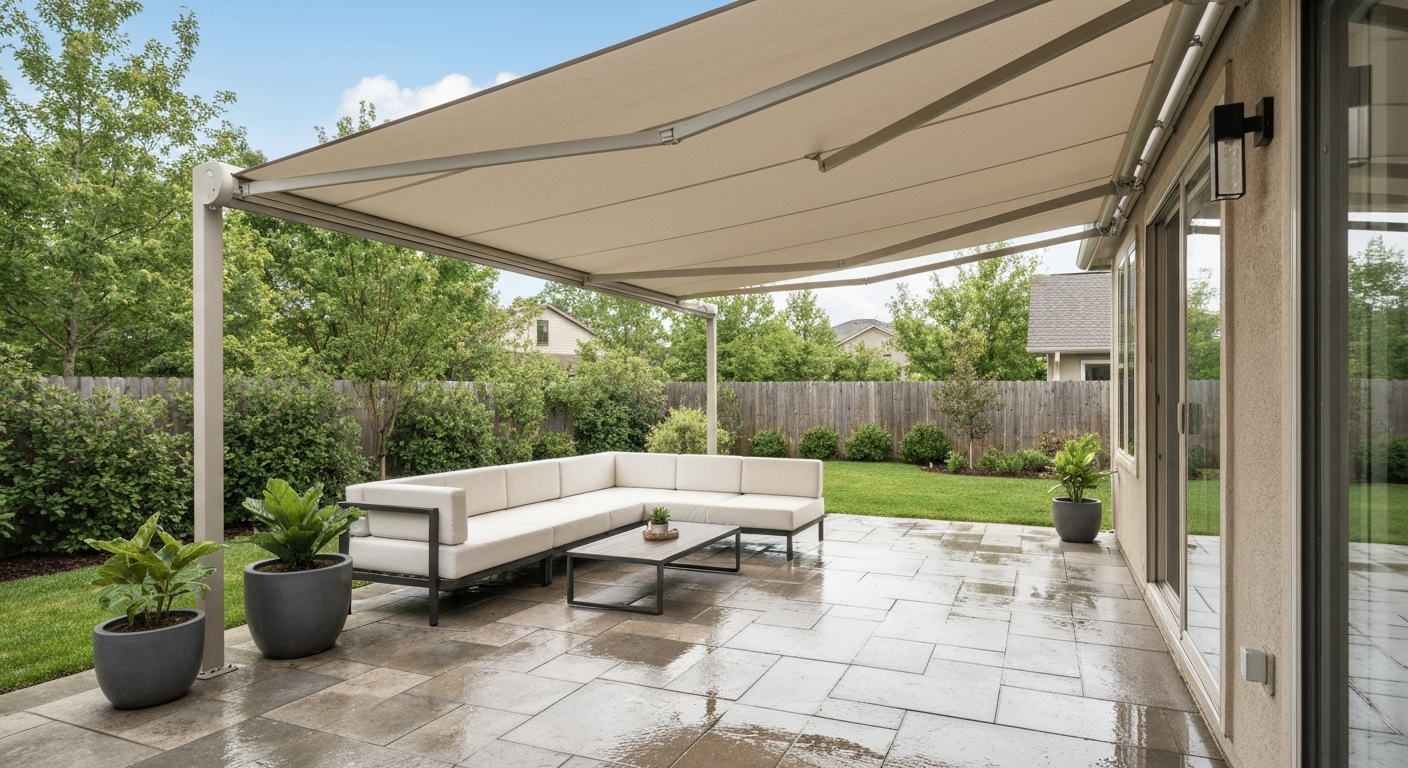
What Is the Best Outdoor Patio Shade: Top Picks & Guide
Find the best outdoor patio shade: sails, umbrellas, awnings, pergolas; costs, installation and a buying checklist.
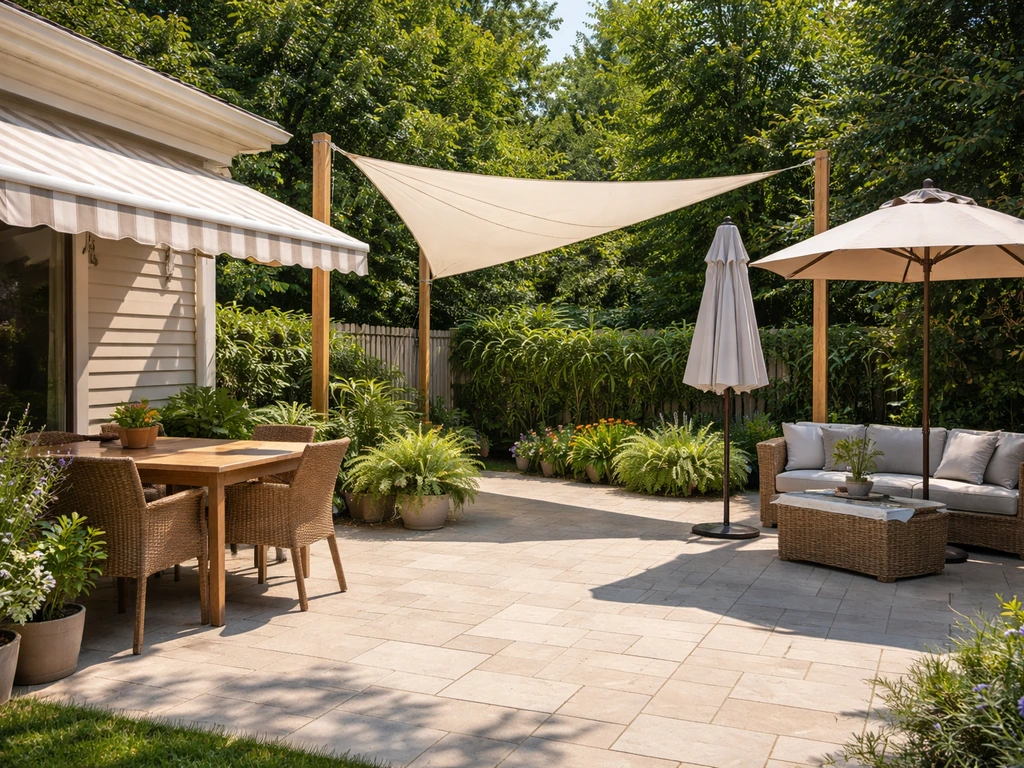
Patio Sun Shade Reviews: Best Options, How to Choose
Compare patio sun shade options with real pros and cons plus tips to choose, install, and avoid common mistakes.
Patio Shade Sail Reviews: What to Buy for Real Coverage
Real patio shade sail reviews: coverage, UV, wind and rain performance, sizing, mounting, durability, value, and setup t